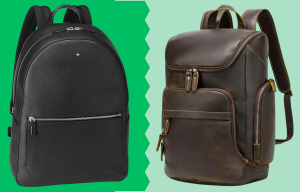
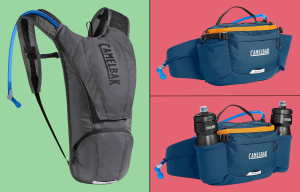
Dyeing a backpack is an excellent way to add a personal touch and transform it into a unique accessory that reflects your style. With various methods and types of dye available, you can achieve stunning results. In this BTG’s comprehensive guide, we will explore different dyeing methods, types of dye, and their effects on quality and longevity. Each method will be linked to specific attributes of dye types. Lastly, our BTG team has complied a few interesting tips to make this more fun and lasting for you and help you over understanding that how to dye a backpack in detail.
Methods of Dyeing Backpacks
- Immersion Method

This method involves fully submerging the backpack in a dye bath, allowing for even color distribution. It is suitable for achieving uniform color on the entire backpack. This one is the probably most common way of dyeing absolutely anything, and the simplest way does its magic every time.
2. Dip Dye Method

Dip-dyeing creates a gradient effect by partially immersing the backpack in the dye bath. It results in a fading or ombre effect from one color to another. This gives a more artistic and a novel look to your backpack.
3. Tie-Dyeing Method

Tie-dyeing involves twisting, folding, or tying sections of the backpack with rubber bands or clips before applying the dye. It creates vibrant and unique patterns.
Types of Dye and Their Effects
1. Fabric Dye: Fabric dyes are specifically designed for natural fibers, such as cotton or canvas. They offer vibrant and long-lasting colors, ensuring high-quality results. Fabric dyes are suitable for all dyeing methods.
2. Acid Dye: Acid dyes are primarily used for synthetic fibers, including nylon or polyester backpacks. They require high heat and an acidic environment for optimal color absorption. The colors achieved with acid dyes may not be as long-lasting as fabric dyes. Acid dyes are compatible with the immersion and dip-dyeing methods. This is mostly use in industrial dyeing of bulk items, and mostly gives adequate results under carefully controlled processing.
3. Natural Dye: Natural dyes are derived from plant-based sources. They provide unique and earthy tones, and their longevity can vary depending on the specific plant used and the dyeing method employed. Natural dyes work well with the tie-dyeing method, creating a connection to nature and sustainable practices.
Steps for Dyeing a Backpack – The Immersion Method
Preparing the backpack:
Remove any tags or plastic coverings, and wash the backpack according to the manufacturer’s instructions. Ensure it is completely dry. We prefer sun drying while putting your backpack inside out, this not only perfectly dries the backpack but would also remove any bad odors.
Choose the dye:
Select a fabric dye suitable for your backpack’s material and desired color outcome. Prepare the dye according to the manufacturer’s instructions.
Wet the backpack:
Soak the backpack in warm water or run it under a faucet until thoroughly saturated. Wring out any excess water, leaving the backpack damp. Gently squeeze the backpack to rinse out excess dripping water.
Prepare the dye bath:
Fill a plastic container or bucket with enough hot water to cover the backpack. Add the fabric dye to the water and mix it well. Slowly sprinkle the adequate amount in the tub so that it dissolves evenly without leaving any lumps.
Submerge the backpack:
Immerse the damp backpack in the dye bath, ensuring even coverage. Use your hands or a stirring utensil to agitate gently, ensuring all areas are evenly covered.
Allow the dye to set:
Follow the dye manufacturer’s instructions for the recommended setting time. Cover the container to prevent the backpack from drying out during this time.
Rinse and wash:
Once the dye has set, rinse the backpack under cold water until the water runs clear. Gradually increase the water temperature to warm and continue rinsing until no more dye color comes out. Finally, wash the backpack with mild detergent to remove any remaining dye residue.
Post-dyeing care:
Inspect the backpack for any uneven patches. If desired, repeat the dyeing process on specific sections to achieve a more consistent look. Wash the backpack separately for the first few washes to prevent color bleeding onto other items.
Pro Tips
Experiment with color combinations: Mix different dye colors to create unique shades and blends. Explore gradient effects by using varying concentrations of the same color dye.
Create patterns with stencils or tape: Use stencils or adhesive tape to create patterns on the backpack before dying. Apply the dye carefully around the stencils or tape, and once dry, remove them to reveal your desired pattern.
Add embellishments: After dyeing your backpack, enhance its uniqueness by adding fabric paint, patches, or embroidery.
Protect non-dyeable parts: Cover non-dyeable parts like zippers or buckles with tape or plastic wrap to prevent staining during the dyeing process.
Safety precautions: Ensure proper ventilation during dyeing to avoid inhaling fumes. Wear gloves and an apron to protect your skin and clothing from dye stains.
Customized tie-dyeing techniques: Explore different tying techniques such as bull’s eye, spiral, or accordion folds to create distinctive tie-dye patterns on your backpack.
Conclusion
Dyeing a backpack allows you to unleash your creativity and personalize your accessory. By understanding different dyeing methods and types of dye, you can achieve impressive results that reflect your style. The immersion method, along with the appropriate dye type, ensures high-quality and long-lasting color on your backpack. Follow the sequential steps provided in this guide, and incorporate the interesting tips for a successful backpack dyeing experience at home. Get ready to flaunt your uniquely dyed backpack that showcases your creativity and individuality


